Animation of LEDs doing things
We're going to learn how to connect a strip of LED lights to a computer and control them with your programs. This approach controls the lights with Javacript, but there are libraries for pretty much every programming language.
What you need
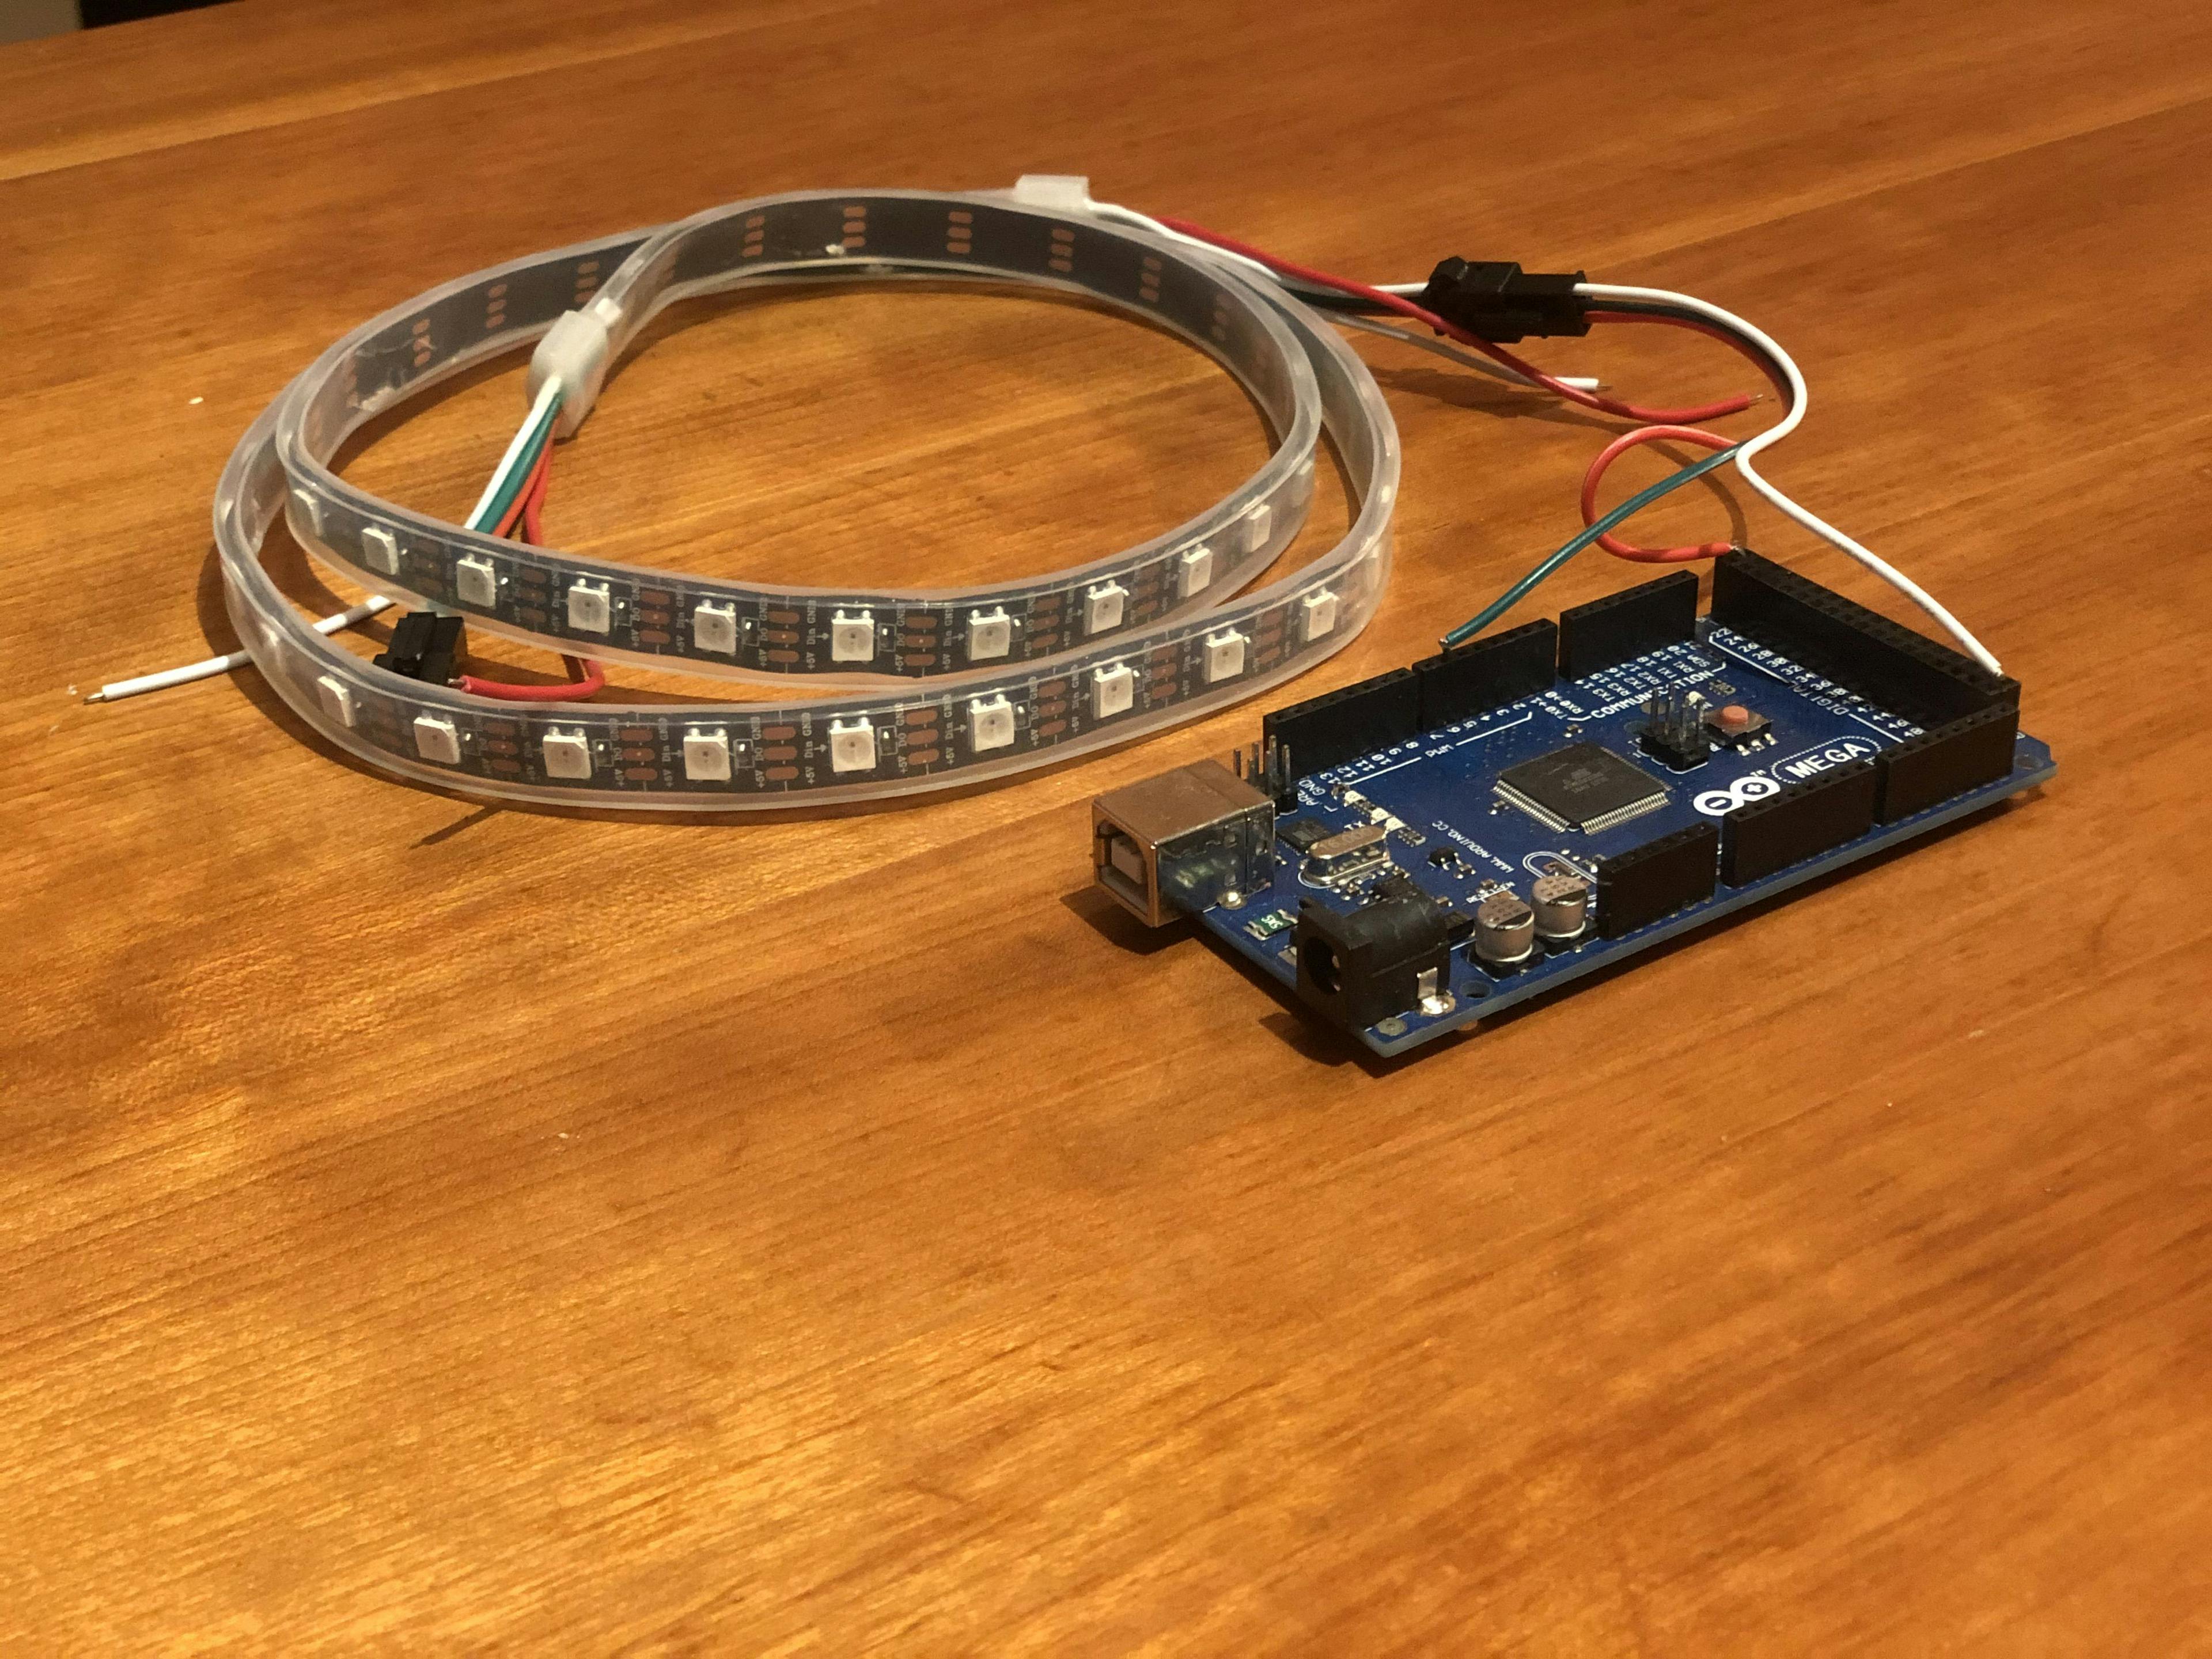
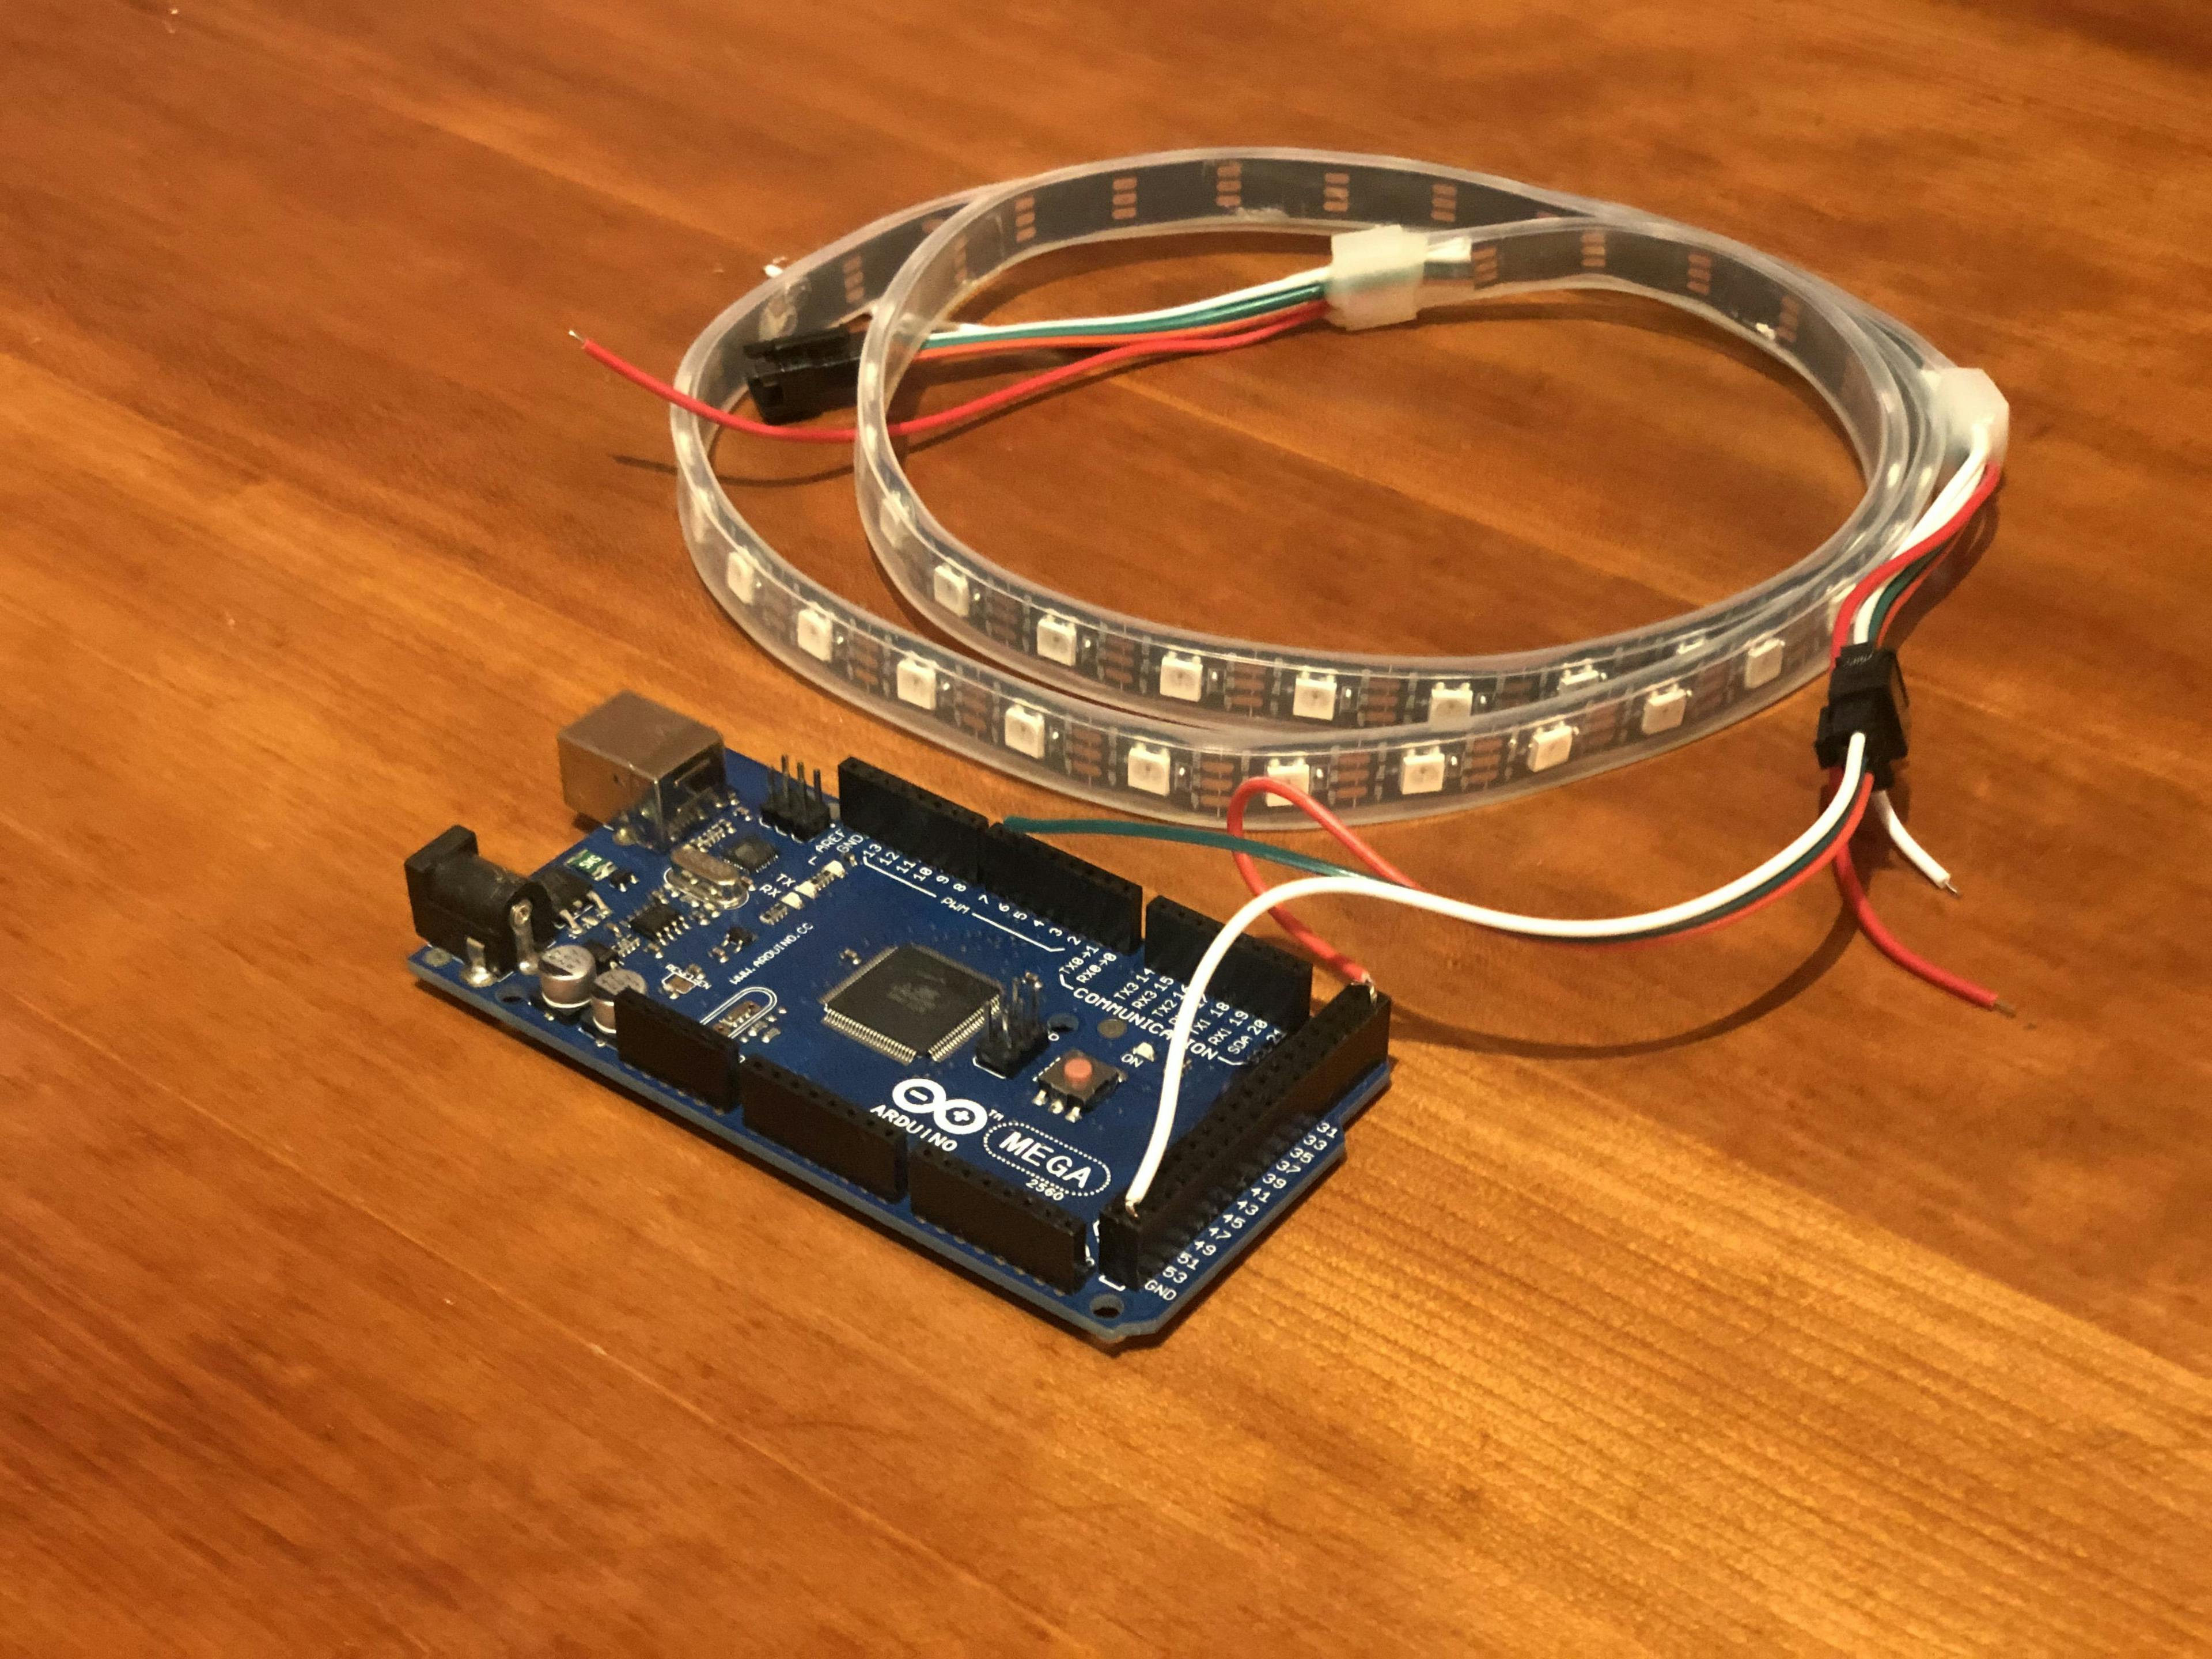
Close up of LED strip
You'll need an LED light strip that works with the Neopixel style controller. If your LED strip has a bunch of individual LEDs and three cables (+5V, Ground, Data) it will probably work.
Close up of Arduino
You will also need an Arduino to act as the negotiator between your computer and your LED strips, as your computer hasn't yet learned to get along alone with your LEDs. If your computer can talk to LEDs directly, hold on to it - that's a keeper.
Connecting your LED strip to your arduino
I used the amazing Adafruit NeoPixel Uberguide to teach me how to connect my LED strip to my Arduino. They recommend hooking up resistors and capacitors and external power supplies to it, but being the electrical noob I am I just hooked up the LED strip directly to the +5, GRND, and digital pin (49 in my case) and everything worked. Here's what my incredibly basic wiring looked like:
Flashing your arduino with Firmata
Your arduino needs some code that will let it listen for commands and relay them to your LEDs. This can be done manually, but it's a pain to do; I spent nearly a month trying to get it to work, and I never managed to make a flawless implementation.
Luckily, a team of people have done this hard work for us. We just need to install the Firmata protocol, which makes it way easier to talk to an arduino programatically. I used interchange to simplify the process of installing the firmware onto Arduino.
To install interchange, run npm install nodebots-interchange in an NPM instance. From there, you can run interchange by typing npx interchange.
Installing the Firmware
To install the node-pixel firmware on your arduino, run the following interchange command
npx interchange install git+https://github.com/ajfisher/node-pixel -a mega --firmata
Note, the -a flag indicates your Arduino's type. I typed mega because I have an Arduino Mega, but if you have an Uno type uno instead.
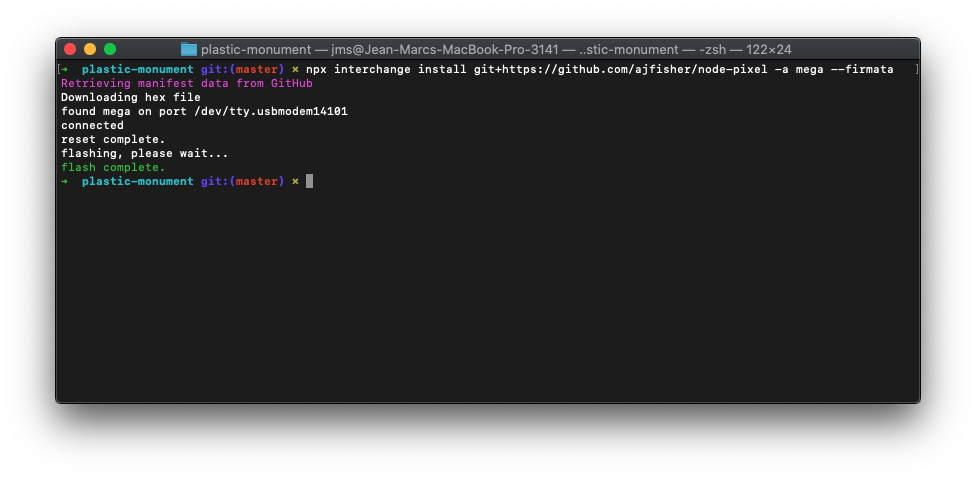
Now your Arduino is ready to talk to the node-pixel library!
Installing Node Pixel
We're going to talk to the LED strip by using the node-pixel node.js library. If you don't use node.js, there are Python and Ruby libraries as well.
node-pixel is made up of two parts: the firmware that runs on your arduino and listens for commands, and the node.js library that allows you to program your LEDs.
Installing the Library
To install node-pixel, type npm install node-pixel. Simple as that!
Writing your first program
Let's try our first example node-pixel code. Create a Node file and enter the following code (source):
pixel = require("node-pixel");
five = require("johnny-five");

var board = new five.Board();
var strip = null;

board.on("ready", function() {
  // Define our hardware.
  // It's a 12px ring connected to pin 6.
  strip = new pixel.Strip({
    board: this,
    controller: "FIRMATA",
    strips: [ {pin: 6, length: 12}, ],
    gamma: 2.8,
  });

  // Just like DOM-ready for web developers.
  strip.on("ready", function() {
    // Set the entire strip to pink.
    strip.color('#903');

    // Send instructions to NeoPixel.
    strip.show();
  });

  // Allows for command-line experimentation!
  this.repl.inject({
    strip: strip
  });
});
Run the script, and... 🎉! Your LED light strip should be blinking.
This is just the start. To learn about what you can do with your new friend, take a look at node-pixel's documentation
Troubleshooting
NoWritablePortError

If you're seeing the following error: NoWritablePortError: Node Pixel FIRMATA controller requires IO that can write out, it could be because of a version issue with firmata.
One possible solution is to run the following:
npm install firmata@1.0.0 --save
... and reflash your arduino with the same interchange command you used before.
I wasn't able to get this solution to work, but I did manage to get things working with the j5-firmata-upg branch of node-pixel. To install this branch, type the following commands:
npm install ajfisher/node-pixel#j5-firmata-upg
npx interchange install git+https://github.com/ajfisher/node-pixel\#j5-firmata-upg -a mega --firmata
Timeout
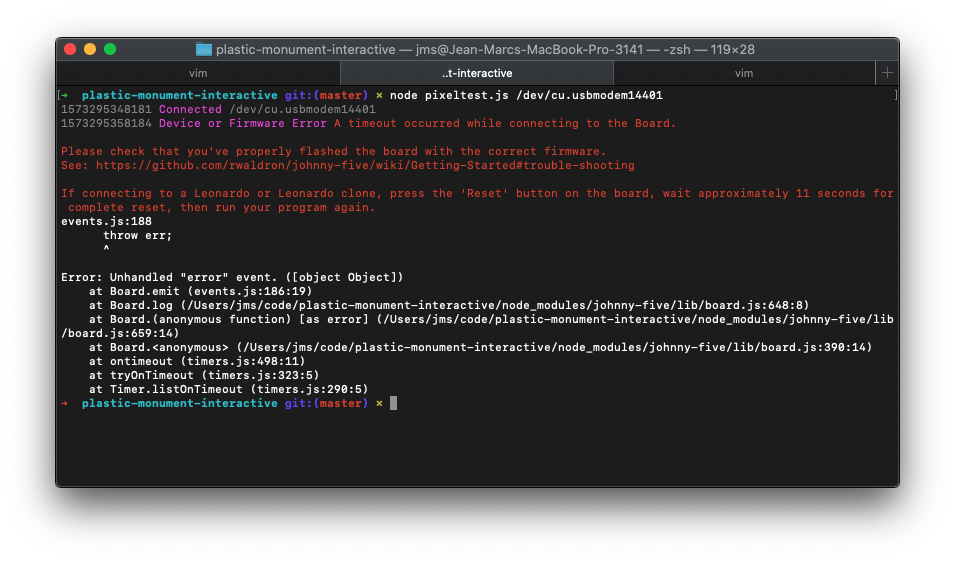
I had a devil of a time with this issue:
Device or Firmware Error A timeout occurred while connecting to the Board.
In my case, I was never able to figure out exactly what went wrong. Reflashing the firmware and re-installing node-pixel seemed to solve the issue.
No such file or directory
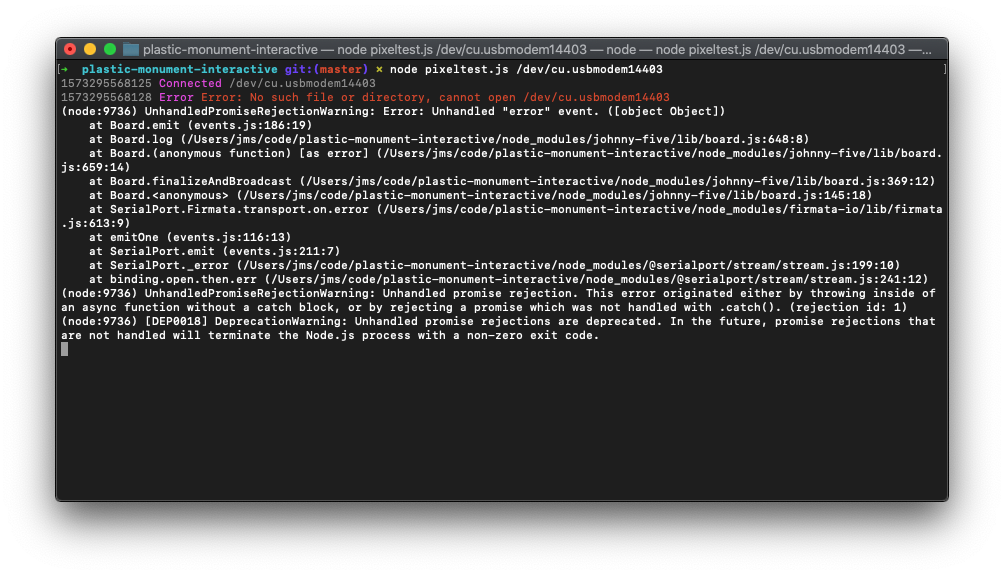
If you see Error: No such file or directory, cannot open /dev/cu.usbmodem14403, check your arduino's address. It's likely incorrect.
Finding the usb port your arduino is connected to
In some cases, you may need to figure out the address of your LED strip - where it 'lives' on the computer. To do this, we look for the device address. This part will be a little different depending on your operating system, but for a mac you type ls /dev/* | grep usb. If more than one thing shows up, you will need to unplug the arduino and run the command again and look for the difference.
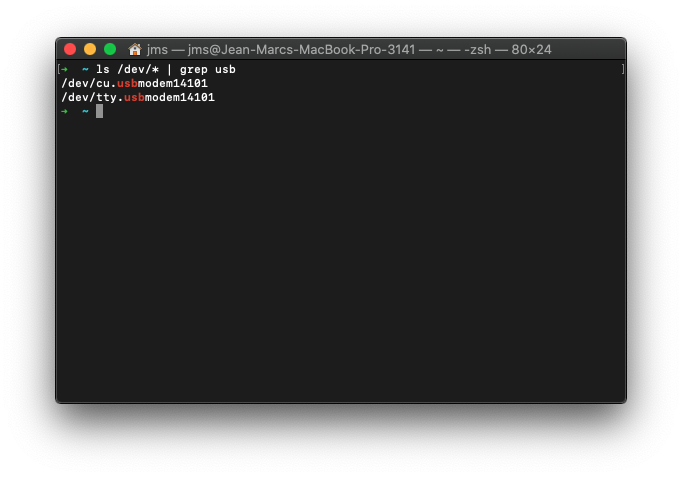
In my case, my arduino was located at /dev/cu.usbmodem14101